ArtTools
Table of Contents
记录一些美术工具的使用方法。
<!– more –>
photoshop
基本操作
工作区
| 鼠标滚轮 | 上下移动工作区 |
| Ctrl+鼠标滚轮 | 左右移动工作区 |
| 窗口/工作区/复位基本功能 | 复位工作区 |
参考线使用
显示/隐藏 参考线
菜单 视图/显示/参考线 快捷键 Ctrl+;
查看参考线坐标信息
打开标尺线(Ctrl+r),查看参考线和标尺交点的值。
鼠标处位置、颜色信息
菜单 窗口/信息 打开,信息面板。
颜色设置
菜单 编辑/颜色设置 打开,颜色设置对话框。
- Adobe PhotoShop 中的色彩管理设置 https://www.colortell.com/3436.html
Usage
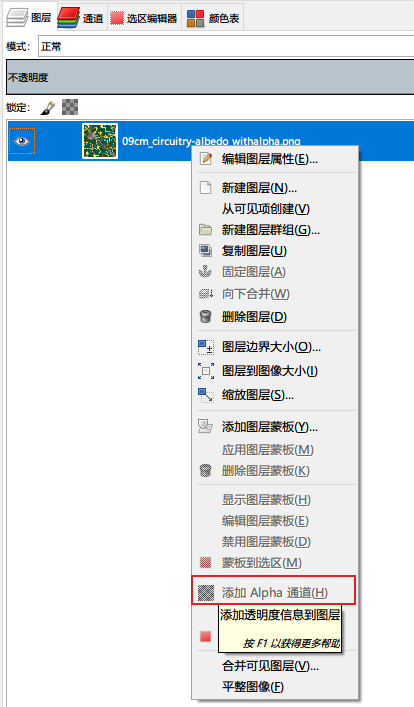
将 alpha 固化到 rgb 通道
- 复制当前图层得到新的图层
- 将 alpha 通道转化为选区,反向选择
- Ctrl+X 裁切选中区域,隐藏 alpha 通道,就可以将 alpha 固化到 rgb 通道
存储为 TGA 格式
菜单 File/Save a Copy,选择 TGA 格式。
Script
Base
object to string
var args = dialog();
alert(args.toSource());
异常处理
try
{
    // ......
}
catch(e)
{
    alert(e);
}
GUI
hello world
#target photoshop

function main()
{
    try
    {
        var args = dialog();
        alert(args.toSource());
    }
    catch(e)
    {
        alert(e)
    }
}
main();

function dialog()
{
    var win = new Window("dialog", "HelloWorld")

    // informational text
    win.add("statictext", undefined, "test label")

    // test edit text
    var textA = win.add("edittext", undefined, "")
    textA.characters = 5;
    textA.active = true;

    var textB = win.add("edittext", undefined, "")
    textB.characters = 10;
    textB.active = true;

    // test btn
    win.add("button", undefined, "OK")
    if(win.show()==1)
    {
        return { "textA":textA.text, "textB":textB.text }
    }
}
modal dialog
#target photoshop

var GlobalVar = {
    "appVersion" : 0,
    "rLabel" : null,
    "gLabel" : null,
    "bLabel" : null,
};

function main()
{
    try
    {
        showWindow ();
    }
    catch(e)
    {
        alert(e)
    }
}
main();

function showWindow()
{
    var res = "dialog { alignChildren: 'fill', \
        text : 'Dialog',\
        info: Panel { orientation: 'column', alignChildren:'right', \
            text: 'Color Helper', \
            name: Group { orientation: 'row', \
                r: StaticText { text:'R:0' }, \
                g: StaticText { text:'G:0' }, \
                b: StaticText { text:'B:0' }, \
            } \
        }, \
        workInfo: Panel { orientation: 'column', \
            text: 'Work Info', \
            name: Group { orientation: 'row', \
                s: StaticText { text:'Company name:' }, \
                e: EditText { characters: 30 }, \
                checkBox1: Checkbox { text: 'CheckBox 1', value: true }, \
                radio1: RadioButton { text: 'RadioButton', value: true }\
            } \
        }, \
        buttons: Group { orientation: 'row', alignment: 'right', \
            cancelBtn: Button { text:'Cancel', properties:{name:'cancel'} } \
        }, \
    }";

    var win = new Window( res );
    win.center();
    GlobalVar.rLabel = win.info.name.r;
    GlobalVar.gLabel = win.info.name.g;
    GlobalVar.bLabel = win.info.name.b;

    win.buttons.cancelBtn.onClick = function()
    {
        return win.close();
    };
    win.workInfo.name.radio1.onClick = function()
    {

    };

    win.show();
    return win;
}
non modal dialog
dialog 为模态对话框
palette 为非模态对话框
palette 显示后会立即返回,因此,需要 while 循环,保持对话框不被关掉。palette 对话框中,EditText 控件不可用,需要弹出 dialog 来展示 EditText 控件。
#target photoshop

var GlobalVar = {
    "appVersion" : 0,
    "rLabel" : null,
    "gLabel" : null,
    "bLabel" : null,
    "aLabel" : null,
    "posX" : 0,
    "posY" : 0,
};

function main()
{
    try
    {
        showWindow ();
    }
    catch(e)
    {
        alert(e)
    }
}
main();

function showInputPosWindow()
{
    var res = "dialog { alignChildren: 'fill', \
        text : 'Dialog',\
        info: Panel { orientation: 'column', alignChildren:'right', \
            text: 'Input Pos', \
            pos: Group { orientation: 'row', \
                xText: StaticText { text:'X: ' }, x: EditText { text:'1', characters: 8},\
                yText: StaticText { text:'Y: ' }, y: EditText { text:'1', characters: 8},\
            }, \
        }, \
        buttons: Group { orientation: 'row', alignment: 'right', \
            okBtn: Button { text:'OK', properties:{name:'ok'} }, \
            cancelBtn: Button { text:'Cancel', properties:{name:'cancel'} } \
        }, \
    }";

    var posX = GlobalVar.posX;
    var posY = GlobalVar.posY;
    var win = new Window( res );
    win.center();
    win.buttons.okBtn.onClick = function()
    {
        GlobalVar.posX = posX;
        GlobalVar.posY = posY;
        win.close();
    };

    win.info.pos.x.text = posX;
    win.info.pos.x.text = posY;
    win.info.pos.x.onChange = function()
    {
        posX = Number(win.info.pos.x.text)
        if(isNaN (GlobalVar.posX))
        {
            posX = 0;
            win.info.pos.x.text = '0';
        }
    };
    win.info.pos.y.onChange = function()
    {
        posY = Number(win.info.pos.y.text)
        if(isNaN (posY))
        {
            posY = 0;
            win.info.pos.y.text = '0';
        }
    };
    win.show();
}

function showWindow()
{
    var res = "palette { alignChildren: 'fill', \
        text : 'Dialog',\
        info: Panel { orientation: 'column', alignChildren:'right', \
            text: 'Color Helper', \
            pos: Group { orientation: 'row', \
                x: StaticText { text:'X:      ', preferredSize:[60,18]}, \
                y: StaticText { text:'Y:      ', preferredSize:[60,18]}, \
            }, \
            rgbValue : Group { orientation: 'row', \
                r: StaticText { text:'R:     0', preferredSize:[60,18]}, \
                g: StaticText { text:'G:     0', preferredSize:[60,18]}, \
                b: StaticText { text:'B:     0', preferredSize:[60,18]}, \
                a: StaticText { text:'A:     0', preferredSize:[60,18]}, \
            } \
        }, \
        buttons: Group { orientation: 'row', alignment: 'right', \
            inputPosBtn: Button { text:'Input Pos', properties:{name:'ok'} }, \
            cancelBtn: Button { text:'Cancel', properties:{name:'cancel'} } \
        }, \
    }";

    var win = new Window( res );
    win.center();
    GlobalVar.rLabel = win.info.rgbValue.r;
    GlobalVar.gLabel = win.info.rgbValue.g;
    GlobalVar.bLabel = win.info.rgbValue.b;
    GlobalVar.aLabel = win.info.rgbValue.a;

    var isClosed = false;
    win.buttons.inputPosBtn.onClick = function()
    {
        showInputPosWindow();
        RefreshRGB();
    };
    win.buttons.cancelBtn.onClick = function()
    {
        isClosed = true;
    };

    function RefreshPosUI()
    {
        win.info.pos.x.text = "X: " + GlobalVar.posX;
        win.info.pos.y.text = "Y: " + GlobalVar.posY;
    }

    function RefreshRGB()
    {
        RefreshPosUI();

        var pointSample = app.activeDocument.colorSamplers.add([GlobalVar.posX, GlobalVar.posY]);
        GlobalVar.rLabel.text = "R:" + pointSample.color.rgb.red;
        GlobalVar.gLabel.text = "G:" + pointSample.color.rgb.green;
        GlobalVar.bLabel.text = "B:" + pointSample.color.rgb.blue;
        var alpha = 0;
        if(activeDocument!=null && activeDocument.activeLayer!=null)
        {
            alpha = activeDocument.activeLayer.opacity;
        }
        GlobalVar.aLabel.text = "A:" + alpha;
        pointSample.remove();
    }

    RefreshRGB();
    win.show();

    while(!isClosed)
    {
        app.refresh();
    }
}
UseCase
File & Directory
选择目录
var outFolder = Folder(oldPath).selectDlg("Select Export Path");
if (!outFolder.exists) {
    outFolder.create();
}
遍历 layer groups,layers
遍历 layer groups,处理 layer group 内的每个 layer
for(var a=0; a<doc.layerSets.length; a++)
{
    var lname = doc.layerSets[a].name;
    if (lname.substr(-4) == ".png")
    {
        saveLayer(doc.layers.getByName(lname), lname, oldPath, true);
    }
    else
    {
        // recursive
        scanLayerSets(doc.layerSets[a]);
    }
}
遍历不属于 layer groups 内的 layers
for(var j=0; j<doc.artLayers.length; j++)
{
    var name = doc.artLayers[j].name;
    if (name.substr(-4) == ".png")
    {
        saveLayer(el.layers.getByName(name), name, oldPath, false);
    }
}
遍历所有 layers
for (i = 0; i < doc.layers.length; i++)
{
    if (doc.layers[i].visible)
    {
        foundVisible = true
        break
    }
}
录制 Action 为 Script
ScriptingListener 插件安装
- 关闭 PS
- 下载 ScriptingListener 插件,并解压 https://download.adobe.com/pub/adobe/photoshop/win/13.x/Win_Scripting_Plug-In.zip
- 将 Scripting Utilites 目录下的 ScriptListener.8li 文件 Copy 到下面路径
macOS: Applications\Adobe Photoshop [Photoshop_version]\Plug-ins\
Windows: Program Files\Adobe\Adobe Photoshop [Photoshop_version]\Plug-ins\ - 重启 PS
插件下载地址 https://helpx.adobe.com/photoshop/kb/downloadable-plugins-and-content.html#ScriptingListenerplugin
官网说明文档 https://github.com/Adobe-CEP/CEP-Resources/blob/master/Documentation/Product%20specific%20Documentation/Photoshop%20Scripting/photoshop-scripting-guide-2020.pdf
ScriptingListener 插件使用
安装 ScriptingListener 插件后,在 PS 中的操作会被录制到桌面的日志文件中。文件名为 ScriptingListenerJS.log 和 ScriptingListenerVB.log
// =======================================================
// 对图片进行顺时针旋转 90
var idRtte = charIDToTypeID( "Rtte" );
var desc315 = new ActionDescriptor();
var idnull = charIDToTypeID( "null" );
var ref7 = new ActionReference();
var idDcmn = charIDToTypeID( "Dcmn" );
var idOrdn = charIDToTypeID( "Ordn" );
var idFrst = charIDToTypeID( "Frst" );
ref7.putEnumerated( idDcmn, idOrdn, idFrst );
desc315.putReference( idnull, ref7 );
var idAngl = charIDToTypeID( "Angl" );
var idAng = charIDToTypeID( "#Ang" );
desc315.putUnitDouble( idAngl, idAng, 90.000000 );
executeAction( idRtte, desc315, DialogModes.NO );

// =======================================================
// 选中 ps-test1 layer
var idslct = charIDToTypeID( "slct" );
var desc325 = new ActionDescriptor();
var idnull = charIDToTypeID( "null" );
var ref8 = new ActionReference();
var idLyr = charIDToTypeID( "Lyr " );
ref8.putName( idLyr, "ps-test1" );
desc325.putReference( idnull, ref8 );
var idMkVs = charIDToTypeID( "MkVs" );
desc325.putBoolean( idMkVs, false );
var idLyrI = charIDToTypeID( "LyrI" );
var list8 = new ActionList();
list8.putInteger( 3 );
desc325.putList( idLyrI, list8 );
executeAction( idslct, desc325, DialogModes.NO );
// 将当前激活的layer duplicate 到新的文档中,并激活新的文档
// =======================================================
var idMk = charIDToTypeID( "Mk  " );
var desc253 = new ActionDescriptor();
var idnull = charIDToTypeID( "null" );
var ref4 = new ActionReference();
var idDcmn = charIDToTypeID( "Dcmn" );
ref4.putClass( idDcmn );
desc253.putReference( idnull, ref4 );
var idNm = charIDToTypeID( "Nm  " );
desc253.putString( idNm, """new-ps-test1""" );
var idUsng = charIDToTypeID( "Usng" );
var ref5 = new ActionReference();
var idLyr = charIDToTypeID( "Lyr " );
var idOrdn = charIDToTypeID( "Ordn" );
var idTrgt = charIDToTypeID( "Trgt" );
ref5.putEnumerated( idLyr, idOrdn, idTrgt );
desc253.putReference( idUsng, ref5 );
var idVrsn = charIDToTypeID( "Vrsn" );
desc253.putInteger( idVrsn, 5 );
executeAction( idMk, desc253, DialogModes.NO );
导出 Layers 为 PNG
#target photoshop

function main(){
    if(!documents.length) return;
    var doc = activeDocument;
    var oldPath = activeDocument.path;

    var outFolder = Folder(oldPath).selectDlg("Select Export Path");
    if(outFolder==null)
    {
        alert("Cancle Export Operation!");
        return;
    }

    for (i = 0; i < doc.layers.length; i++)
    {
        if (doc.layers[i].visible)
        {
            var name = doc.layers[i].name;
            saveLayer(doc.layers.getByName(name), name, oldPath, false);
        }
    }

    function saveLayer(layer, lname, path, shouldMerge) {
        activeDocument.activeLayer = layer;
        duplayer();

        activeDocument.trim(TrimType.TRANSPARENT, true, true, true, true);
        var saveFile= File(path +"/out/"+lname+".png");
        SavePNG(saveFile);
        app.activeDocument.close(SaveOptions.DONOTSAVECHANGES);
    }
};

function duplayer()
{
    var idMk = charIDToTypeID( "Mk  " );
    var desc253 = new ActionDescriptor();
    var idnull = charIDToTypeID( "null" );
    var ref4 = new ActionReference();
    var idDcmn = charIDToTypeID( "Dcmn" );
    ref4.putClass( idDcmn );
    desc253.putReference( idnull, ref4 );
    var idNm = charIDToTypeID( "Nm  " );
    desc253.putString( idNm, activeDocument.activeLayer.name);
    var idUsng = charIDToTypeID( "Usng" );
    var ref5 = new ActionReference();
    var idLyr = charIDToTypeID( "Lyr " );
    var idOrdn = charIDToTypeID( "Ordn" );
    var idTrgt = charIDToTypeID( "Trgt" );
    ref5.putEnumerated( idLyr, idOrdn, idTrgt );
    desc253.putReference( idUsng, ref5 );
    var idVrsn = charIDToTypeID( "Vrsn" );
    desc253.putInteger( idVrsn, 5 );
    executeAction( idMk, desc253, DialogModes.NO );
};

main();

function SavePNG(saveFile){
    var pngOpts = new ExportOptionsSaveForWeb;
    pngOpts.format = SaveDocumentType.PNG
    pngOpts.PNG8 = false;
    pngOpts.transparency = true;
    pngOpts.interlaced = false;
    pngOpts.quality = 100;
    activeDocument.exportDocument(new File(saveFile),ExportType.SAVEFORWEB,pngOpts);
}
Tools
- ExtendScript Highlights https://marketplace.visualstudio.com/items?itemName=hennamann.jsx
- ExtendScript Debugger https://marketplace.visualstudio.com/items?itemName=Adobe.extendscript-debug
- ExtendScript-Toolkit https://github.com/Adobe-CEP/CEP-Resources/tree/master/ExtendScript-Toolkit
GIMP
Base
显示鼠标信息面板
Windows/Dockable Dialogs/Pointer
添加 Alpha 通道
填充 Alpha 通道
- 选择要填充的区域
- 右键点击图层,选择 Add Layer Mask, 弹框中选择 Layer's alpha channel
- 使用 Bucket Fill Tool 进行填充
- 右键点击图层,选择 Apply Layer Mask
Usage
为图片中物体添加描边
径向模糊
Filters"->"Blur"->"Zoom Motion blur"
3ds max
基本操作
| 快捷键 | 功能 |
|---|---|
| 按下鼠标滚轮拖动 | 拖动视图 |
| Alt+按下鼠标滚轮拖动 | 旋转视图 |
| Alt+w | 最大化、最小化视图切换 |
| z | 重置视角, 也可以点击右上角方向指示图标,再点击图标左上位置的小图标 |
| g | 显示、隐藏场景中网格线 |
| h | 按名称选择物体 |
| l t f u p | 左-顶-前-正交-透视视图切换 |
| F3 | 线框模式显示切换 |
| F4 | EdgedFaces 模式显示切换 |
| 按下 Shift 移动选中物体 | 复制选中物体 |
| Shift +g | 隐藏几何体,只显示骨骼 |
显示 Scene Explorer
方法 1:Main toolbar > Toggle Scene Explorer
方法 2:Menu bar > Tool Menu > Scene Explorer
查看模型使用的材质球
菜单 Rendering/Material Explorer
查看骨骼层级结构
方法 1:Main toolbar > Schematic View
方法 2:Menu bar > Graph Editors menu > New Schematic View
查看修改顶点颜色
ModifierList / VertexPaint
按照顶点颜色显示模型
- Step1 Display / Display Properties/ Vertex Colors
- Step2 Display / Display Color/ Shaded - Object Color
- Step3 场景显示模式切换为 Shaded
如何查看骨骼的绑定权重?
查看权重分布
- Step0 选中蒙皮的模型
- Step1 选中 Modify 选项卡
- Step2 在 Modify Stack 中展开 Skin,选中 Envelope
- Step3 在 Parameters 中的 Bones 列表中选择需要查看的骨骼
建模
Q&A
如何创建一个地球模型,并赋予贴图?
TODO 一个角色如何使用多个材质球?
如何查看模型的 UV 展开?
- 选中模型
- 选中修改选项卡 (Modify)
- 在 Modify List 中选择 Unwrap UVW
- 在 EditUVs 选项组中,点击 Open UV Editor
动画
基础知识
| 关键帧类型 | 颜色 | 功能 |
|---|---|---|
| Planted Key (踩踏/固定关键帧) | 橙色 | 站军姿 等动作,为保持一动不动时使用 |
| Sliding Key(滑动关键点) | 黄色 | 走路、跑步等运动中任何一直接触地面的部位都用滑动关键帧 |
| Free Key(自由关键帧) | 黑色 | 运动中不会一直接触地面的部位都用自由关键帧 |
骨骼绑定步骤
分析模型
性别 女
个性 豪放
职业 坦克(肉盾) 保护队友 控制
形体 人形 两足(无残缺)
分析模型需要活动的部位和道具
CS 人形骨骼自带
手
脚
头
躯干
Bones 骨骼
盾牌
武器
头发
飘带(衣服的裙摆)
骨骼配置
- 确定骨骼重心 与模型重心吻合
- 配置腰或者腿骨骼 让骨骼关节和模型关节吻合
- 根据模型布线来确定躯干
- 确定肩 骨骼肩膀末端(靠近胸的一端)的旋转点要在模型锁骨位置,前端与模型大臂相吻合
- 配置手臂,手,手指
- 配置头
MaxScript
基础语法
if
-- if
if a<b do
(
	-- ...
)

-- if then else
if a<b then
(
	-- ...
)
else
(
	-- ...
)
for 循环
方式一
for i= 1 to tagInfoArr.count do
(
    local tagID = GetIDByName tagInfoArr[i].name
    if tagID==-1 do
    (
        tagID = FrameTagManager.CreateNewTag tagInfoArr[i].name 0
    )
    tagInfoArr[i].id = tagID
)
方式二
for i in 1 to tagInfoArr.count by 2 do
(
    local startTime = FrameTagManager.GetTimeByID tagInfoArr[i].id
    local endTime = FrameTagManager.GetTimeByID tagInfoArr[i+1].id
    local dur = endTime - startTime
    format "i=% dur=%\n" i dur
    if dur>0 do
    (
        configStr = "\n"
        continue
    )
)
string
-- 字符串转 float
"12.1" as float
-- 字符串替换
substituteString srcStr oldStr newStr
local csvFileName = substituteString maxFileName ".max" ".csv"
-- 字符串查找
local tmpIdx = findString tagName endTagNameSuffix
return tmpIdx!=undefined
数组
-- 定义数组
a = #(1,2,3,4)
-- 数组连接
join a #(5,6,7,8)
-- 打印数组元素个数
print a.count
-- 数组排序
fn CompareFunc lhs rhs =
(
    case of
    (
        (lhs.startTime < rhs.startTime):-1
        (lhs.startTime > rhs.startTime):1
        default:0
    )
)
qsort tagInfoArr CompareFunc
结构体
-- 定义结构体 person
Struct person (name, height, age, sex)

-- 定义结构体实例
Bill = person name:"Bill" height:72 age:34 sex:#male
Joe = person name:"Joseph" sex:#male

-- 封装方法
struct myGlobals
(
	myVar1 = undefined,
	myVar2 = undefined,
	myVar3 = undefined,
	mytext = undefined,

	fn run filename =
	(
		mytext = "I'm yours, master!"
		filein filename
	)
)
global myInstance = myGlobals()
myInstance.run "slave.ms"
各种功能
文件操作
-- 打开 csv 文件
filePath = getOpenFileName types:"Excel(*.csv)|*.csv|"
https://knowledge.autodesk.com/search-result/caas/CloudHelp/cloudhelp/2017/ENU/MAXScript-Help/files/GUID-D4B43A33-8342-4BC9-80AB-91460861D37C-htm.html
https://www.vfxarabia.co/read-external-text-file
和 3dsmax 系统界面交互
读写配置文件
fn SetBoolINISetting key value=
(
-- 		print ("--" + value)
    setINISetting hdxINIFile hdxINISection key value
),

fn GetBoolINISetting key=
(
    local value = getINISetting hdxINIFile hdxINISection key
-- 		print ("--" + value)
    return value=="true"
),
遍历
Tips
print 比较诡异
print "hello ->" + "world"
-- output: 输出两次
-- "hello ->"
-- "hello ->world"

print("hello ->" + "world")
-- output: 输出两次
-- "hello ->world"
-- "hello ->world"
maxscript 变量不分大小写
-- 下面会重名
local tmpIdx = 1
local TmpIdx = 2
删除老的 macroscript
删除#userScripts 目录下的脚本即可。
#userScripts 的值为 "C:\Users\<UserName>\AppData\Local\Autodesk\3dsMax\<ReleaseNumber> - 64bit\ENU\scripts"
https://knowledge.autodesk.com/search-result/caas/CloudHelp/cloudhelp/2015/ENU/MAXScript-Help/files/GUID-F7577416-051E-478C-BB5D-81243BAAC8EC-htm.html
maxscript –Type error: Call needs function or class, got:undefined
安装 maxscript 后,重启 3ds max,执行安装的脚本,报错:maxscript –Type error: Call needs function or class, got:undefined
解决方案:
将脚本放到 C:\Program Files\Autodesk\3ds Max 2014\stdplugs\stdscripts 目录下安装就可以了
– No ""eof"" function for undefined <<
打开文件时报如上错误。
解决方案:
查看被打开的文件是否被其他程序打开了,将其他程序关闭再执行。
Runtime error: Cannot directly set animation context time - use "at time…".
-- 不能直接设置 currentTime
currentTime = 10
-- 需要使用 sliderTime
sliderTime = 10
ERROR
参考资料
基础
- 3ds max9 自学教程 https://jingyan.baidu.com/season/45515
- 3ds max 制作简单动画 https://jingyan.baidu.com/article/91f5db1bcd438e1c7e05e370.html
- 3ds max 官方参考 https://www.autodesk.com/cn/3dsmax/2012help/index.html
- 3ds max 导出 fbx 到 unity http://www.cnblogs.com/wantnon/p/4564522.html
建模
- Zbrush-次时代 游戏角色建模 https://study.163.com/course/courseMain.htm?courseId=1002859005
- 次世代游戏角色模型制作 https://study.163.com/course/introduction.htm?courseId=910003#/courseDetail?tab=1
- 3D 游戏角色模型—将军制作流程 http://blog.sina.com.cn/s/blog_9f9269470101l0rd.html
动画
- 用电脑制作 3D 动画详细过程是怎样的? https://www.zhihu.com/question/31554729
- 茶壶动画制作 https://v.qq.com/x/cover/k4cc6kvbc7bi0qj/y1415xd6w3n.html
Tools
- aseprite 像素风制作工具 https://github.com/aseprite/aseprite
- SpriteIlluminator 2d normal 制作工具 https://www.codeandweb.com/spriteilluminator